Available options
Here are a few options I researched for accessing my services outside of my local network.
Port forwarding. You could forward a specific port of the service, or forward 80 and 443 with a reverse proxy in between. This needs a public static IP assigned to our router by the ISP, and the ISP should also allow port forwarding. Generally, for consumer connections, ISPs assign a dynamic IP, and this can change over time. Dynamic DNS kind of services can help with a dynamic IP with a fixed domain name, but port forwarding is also required, which my ISP do not support as well.
Also, this exposes our server to the open internet and makes it a target for possible threats and DDoS attacks.
Another option could be private VPN solutions like Tailscale, Zerotier, etc. This allows access to all devices connected to the PN network and can only be accessed by the respective VPN.
The only drawback for me is that this requires the VPN client to be installed on everyone’s device, and I do not want to bother with that.
Cloudflare tunnel is another excellent solution to expose local services via Cloudflare tunnel to a domain.
This is potentially a good option for serving static web servers, admin panels, etc. But for my few cases, where I also want to stream movies, view/download/photos my photos, this goes against Cloudflare’s ToC, they could ban my account.
Rent a cheap VPS. This comes with a public static IP. The VPS will work as a VPN for tunnelling requests from the web to the local server, so no heavy load, and the cheap ones will serve the purpose.
I went with a mix of Cloudflare Tunnel and renting a cheap VPS on AWS Lightsail, with 2 vCPUs, 512MB of RAM and 10GB of storage. I will tunnel the VPS and the server over a WireGuard tunnel. The VPS will have the reverse proxy point to the private IP address of the server. The spec is enough just to run a VPN server and a reverse proxy; all the heavy lifting will be done by the server anyway.
Create a Lightsail VPS
- Log in to the AWS console and go to the Lightsail dashboard
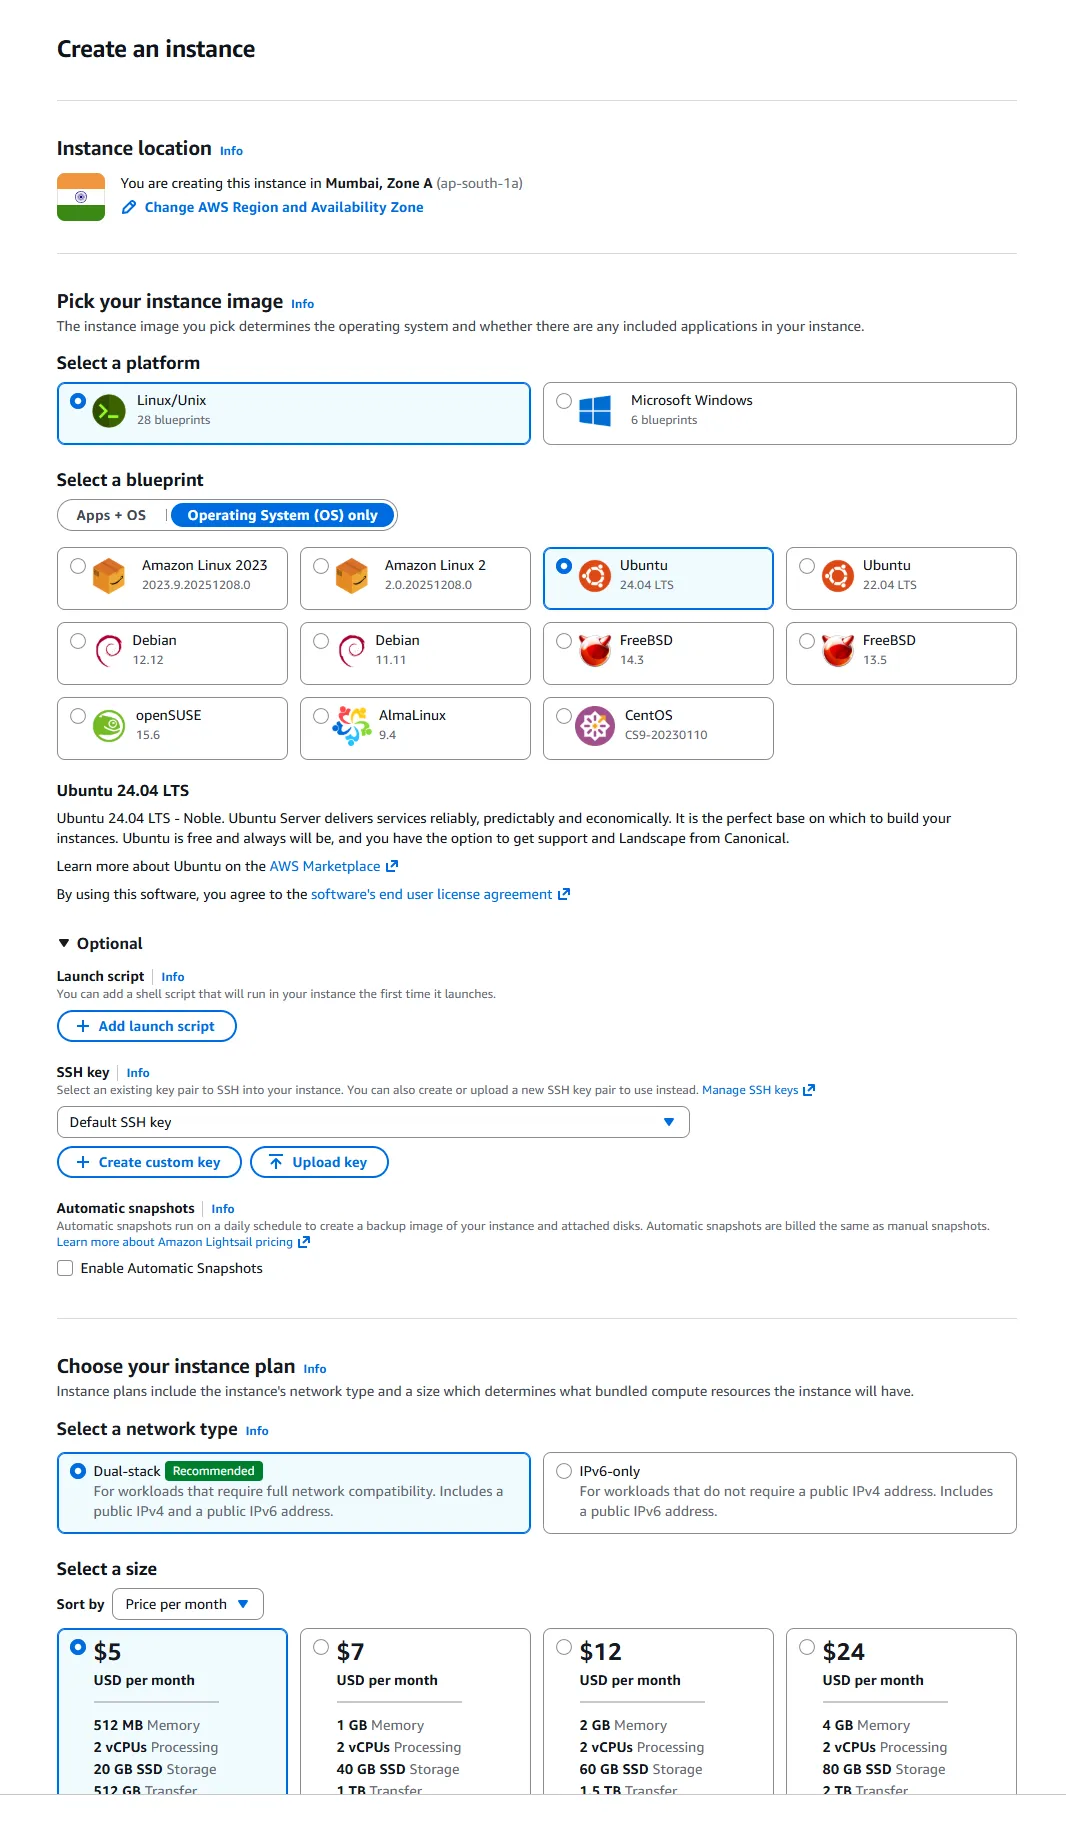
- Click on “Create instance”
- Select region
- Select platform (Linux)
- Select blueprint (OS only, Ubuntu 24.04 LTS)
- Select the size (the cheapest one for me)
- Give the instance a name (ubuntu)
- Click on “Create instance”
Once the instance is created, go to the instance dashboard and download the private key file; this will be needed to log in to the instance.
It is important to attach a fixed IP to the server; otherwise, on every restart of the machine, AWS will assign a new IP to the server. Go to the Netwoking tab under the instance dashboard, and select Attach IP. Once the IP is attached, we will have a fixed IP for the server, even on shutdown or reboot.
You can now SSH to the server using the downloaded private key file
ssh -i ~/LightsailServer.pem ubuntu@43.12.345.67And update the packages
sudo apt update
sudo apt upgradeLet’s allow the required ports from the Lightsail firewall. In the Network tab under the instance dashboard, add a few firewall rules to allow these ports
- 80 (TCP) - HTTP
- 443 (TCP) - HTTPS
- 22 (TCP) - SSH
- 51820 (UDP) - WireGuard VPN will be running on this port, which will be responsible for communicating with our local server
Set up WireGuard tunnel
Once the VPS is ready, set up WireGuard VPN on both the VPS and the local server to create a private VPN tunnel between the VPS and our local server.
“VPS” or “Server”, under square brackets, means where they need to be performed.
-
[VPS, Server]
sudo apt install wireguard -
[VPS, Server] Generate a private and public key pair
wg genkey | tee privatekey | wg pubkey > publickey -
[VPS] Create/modify the WireGuard configuration file
/etc/wireguard/wg0.confand add this configuration[Interface] Address = 10.0.0.1/24 # VPS VPN IP ListenPort = 51820 PrivateKey = <VPS private key> [Peer] PublicKey = <Home server public key> AllowedIPs = 10.0.0.2/32 # Home server VPN client IP PersistentKeepalive = 25 -
[VPS] Enable IP forwarding
sudo sysctl -w net.ipv4.ip_forward=1 sudo sysctl -w net.ipv6.conf.all.forwarding=1Add these settings permanently by uncommenting the line
net.ipv4.ip_forward=1andnet.ipv6.conf.all.forwarding=1in/etc/sysctl.conffile. -
[VPS] Enable WireGuard
sudo wg-quick up wg0 sudo systemctl enable wg-quick@wg0 -
[VPS] Verify the config and the peer is added
sudo wgShould output like this
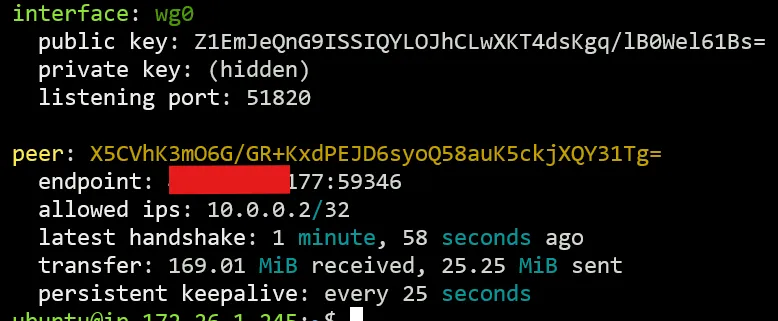
-
[Server] Create/modify the WireGuard configuration file
/etc/wireguard/wg0.confand add this configuration[Interface] Address = 10.0.0.2/24 # Home server VPN IP PrivateKey = <Home server private key] DNS = 10.0.0.2 # Use Pi-hole DNS at home server VPN IP # Lightsail VPS [Peer] PublicKey = <VPS public key> Endpoint = <VPS public IP>:51820 AllowedIPs = 10.0.0.1/32 PersistentKeepalive = 25 -
[Server] Enable WireGuard
sudo wg-quick up wg0 sudo systemctl enable wg-quick@wg0 -
[Server] Verify the config and the peer is added
sudo wgShould output like this

-
You can verify the VPN connection by running the ping command from the VPS to the Server and vice versa
ping 10.0.0.3 # from VPS to server # or ping 10.0.0.2 # from Server to VPSYou should be able to get ping responses from both sides without dropping any packets.
Reverse proxy
Once the VPN is set up, you now have access to the local server from the VPS. You can verify by running curl to any service
curl 10.0.0.2:8096 # Jellyfin serviceYou should be able to get the Jellyfin HTML response back.
Now, set up a reverse proxy to access these services with our domain (service.pijushbarik.com).
Set up Nginx reverse proxy
Next, set up Nginx and expose a local service (e.g. Jellyfin), running on port 8096 on our local service, available to the domain http://jellyfin.pijushbarik.com.
-
Install Nginx
sudo apt update sudo apt install nginx -
Add firewall rules with UFW and enable UFW
sudo ufw allow 'Nginx Full' # allow http and https sudo ufw allow ssh # allow ssh sudo ufw allow 51820/udp # allow wireguard vpn port sudo ufw enable # check ufw status sudo ufw status -
Create Nginx server block
sudo vim /etc/nginx/sites/available/jellyfin.pijushbarik.com -
Add this config to the file
server { listen 80; listen [::]:80; server_name jellyfin.pijushbarik.com; location / { proxy_pass app_server_address; proxy_set_header Host $http_host; proxy_set_header X-Real-IP $remote_addr; proxy_set_header X-Forwarded-For $proxy_add_x_forwarded_for; proxy_set_header X-Forwarded-Proto $scheme; } } -
To enable the site, let’s make a link (or copy) to the file in the sites-enabled directory
sudo ln -s /etc/nginx/sites-available/jellyfin.pijushbarik.com /etc/nginx/sites-enabled/ -
Test the config
sudo nginx -t -
Reload nginx config
sudo nginx -s reload -
Add a DNS “A” record
Type: A
Name: jellyfin
content: <server ip>
With this, you will now be able to open the URL http://jellyfin.pijushbarik.com and would be able to get the Jellyfin website served from our local server.
Secure our domain with HTTPS
Install Certbot to automatically generate an SSL certificate from Let’s Encrypt.
-
Install Certbot with the Nginx plugin
sudo apt install certbot python3-certbot-nginx -
Obtain the certificate
sudo certbot --nginx -d jellyfin.pijushbarik.comThis will generate the certificate, update the Nginx site config to accept HTTPS and redirect traffic from HTTP to HTTPS automatically, and add a background job to renew the certificate automatically.
Once done, you will then have the service on https://pijushbarik.com.
Additionally, you can disable the HTTP (port 80) from the firewall rule to disable traffic on the HTTP port once we are done with the HTTPS certificate generation for all our domains.