How it all started
Ad blocking
The primary reason to begin the self-hosted journey started with the interest of having my own Pi-Hole server for whole network-wide ad blocking. Either locally or via the internet through a VPN (in the future) to have a free and self-hosted ad blocker for myself and other family members.
Photos and backup
To back up all the data, specifically photos & videos, I heavily rely on Google Photos & Drive. From time to time, I make local backup copies and delete old photos from Google. This has to be done periodically for my other family members, too.
Stream movies and shows
I also need an easy way to stream movies and shows available locally with other people in my family.
I started to look for self-hosted solutions, and available software, and came up with this amazing Reddit sub r/selfhosted and r/homelab, where I found so many possibilities, and examples about how people self-host from their data, photos, streaming server, to email server. And then I got my new and latest hobby, to build my Homelab.
::: info These posts could be more of a documentation than some tutorial blog posts. I will document the process of setting up my homelab, improving it, adding new features or services, and fixing things in different posts. When there is any change to my setup, I decided not to modify the existing post; instead, I will create another post about it and refer to it in the old post, which could help find what issues I faced earlier and how I resolved them. This blog post is mostly for my own documentation purposes, maybe in the future I need it again, quickly copy the Docker Compose for my Jellyfin server.
:::
Hardware
The primary thing to get started with self-hosting is some basic hardware: a decent computer and storage (as much as possible). This hardware part could be scaled indefinitely to accommodate whatever we wish to push to the lab.
For the computer part, there are several ways to set up one:
- Rent a decent VPS and storage from cloud service providers like AWS, GCP, Vultr, DigitalOcean, etc, and self-manage your data and services. The data may be hosted locally, but I have not explored this yet.
- Buy a Raspberry Pi, connect external storage with NAS (Network Attached Storage) or DAS (Direct Attached Storage), and connect with LAN to have a local server.
- Use an old laptop or desktop as a local server. Attach a few HDDs or SSDs or a NAS, or DAS. Connect with a LAN and get a local server.
For option 1, accessing your server from the internet is easy. Directly access with the VPS’s associated IP address or install a reverse proxy if you have a domain. For options 2 and 3, getting your server to the internet is a little tricky and which I will discuss later. Initially, I will set up everything locally before getting it accessible via the internet with a domain.
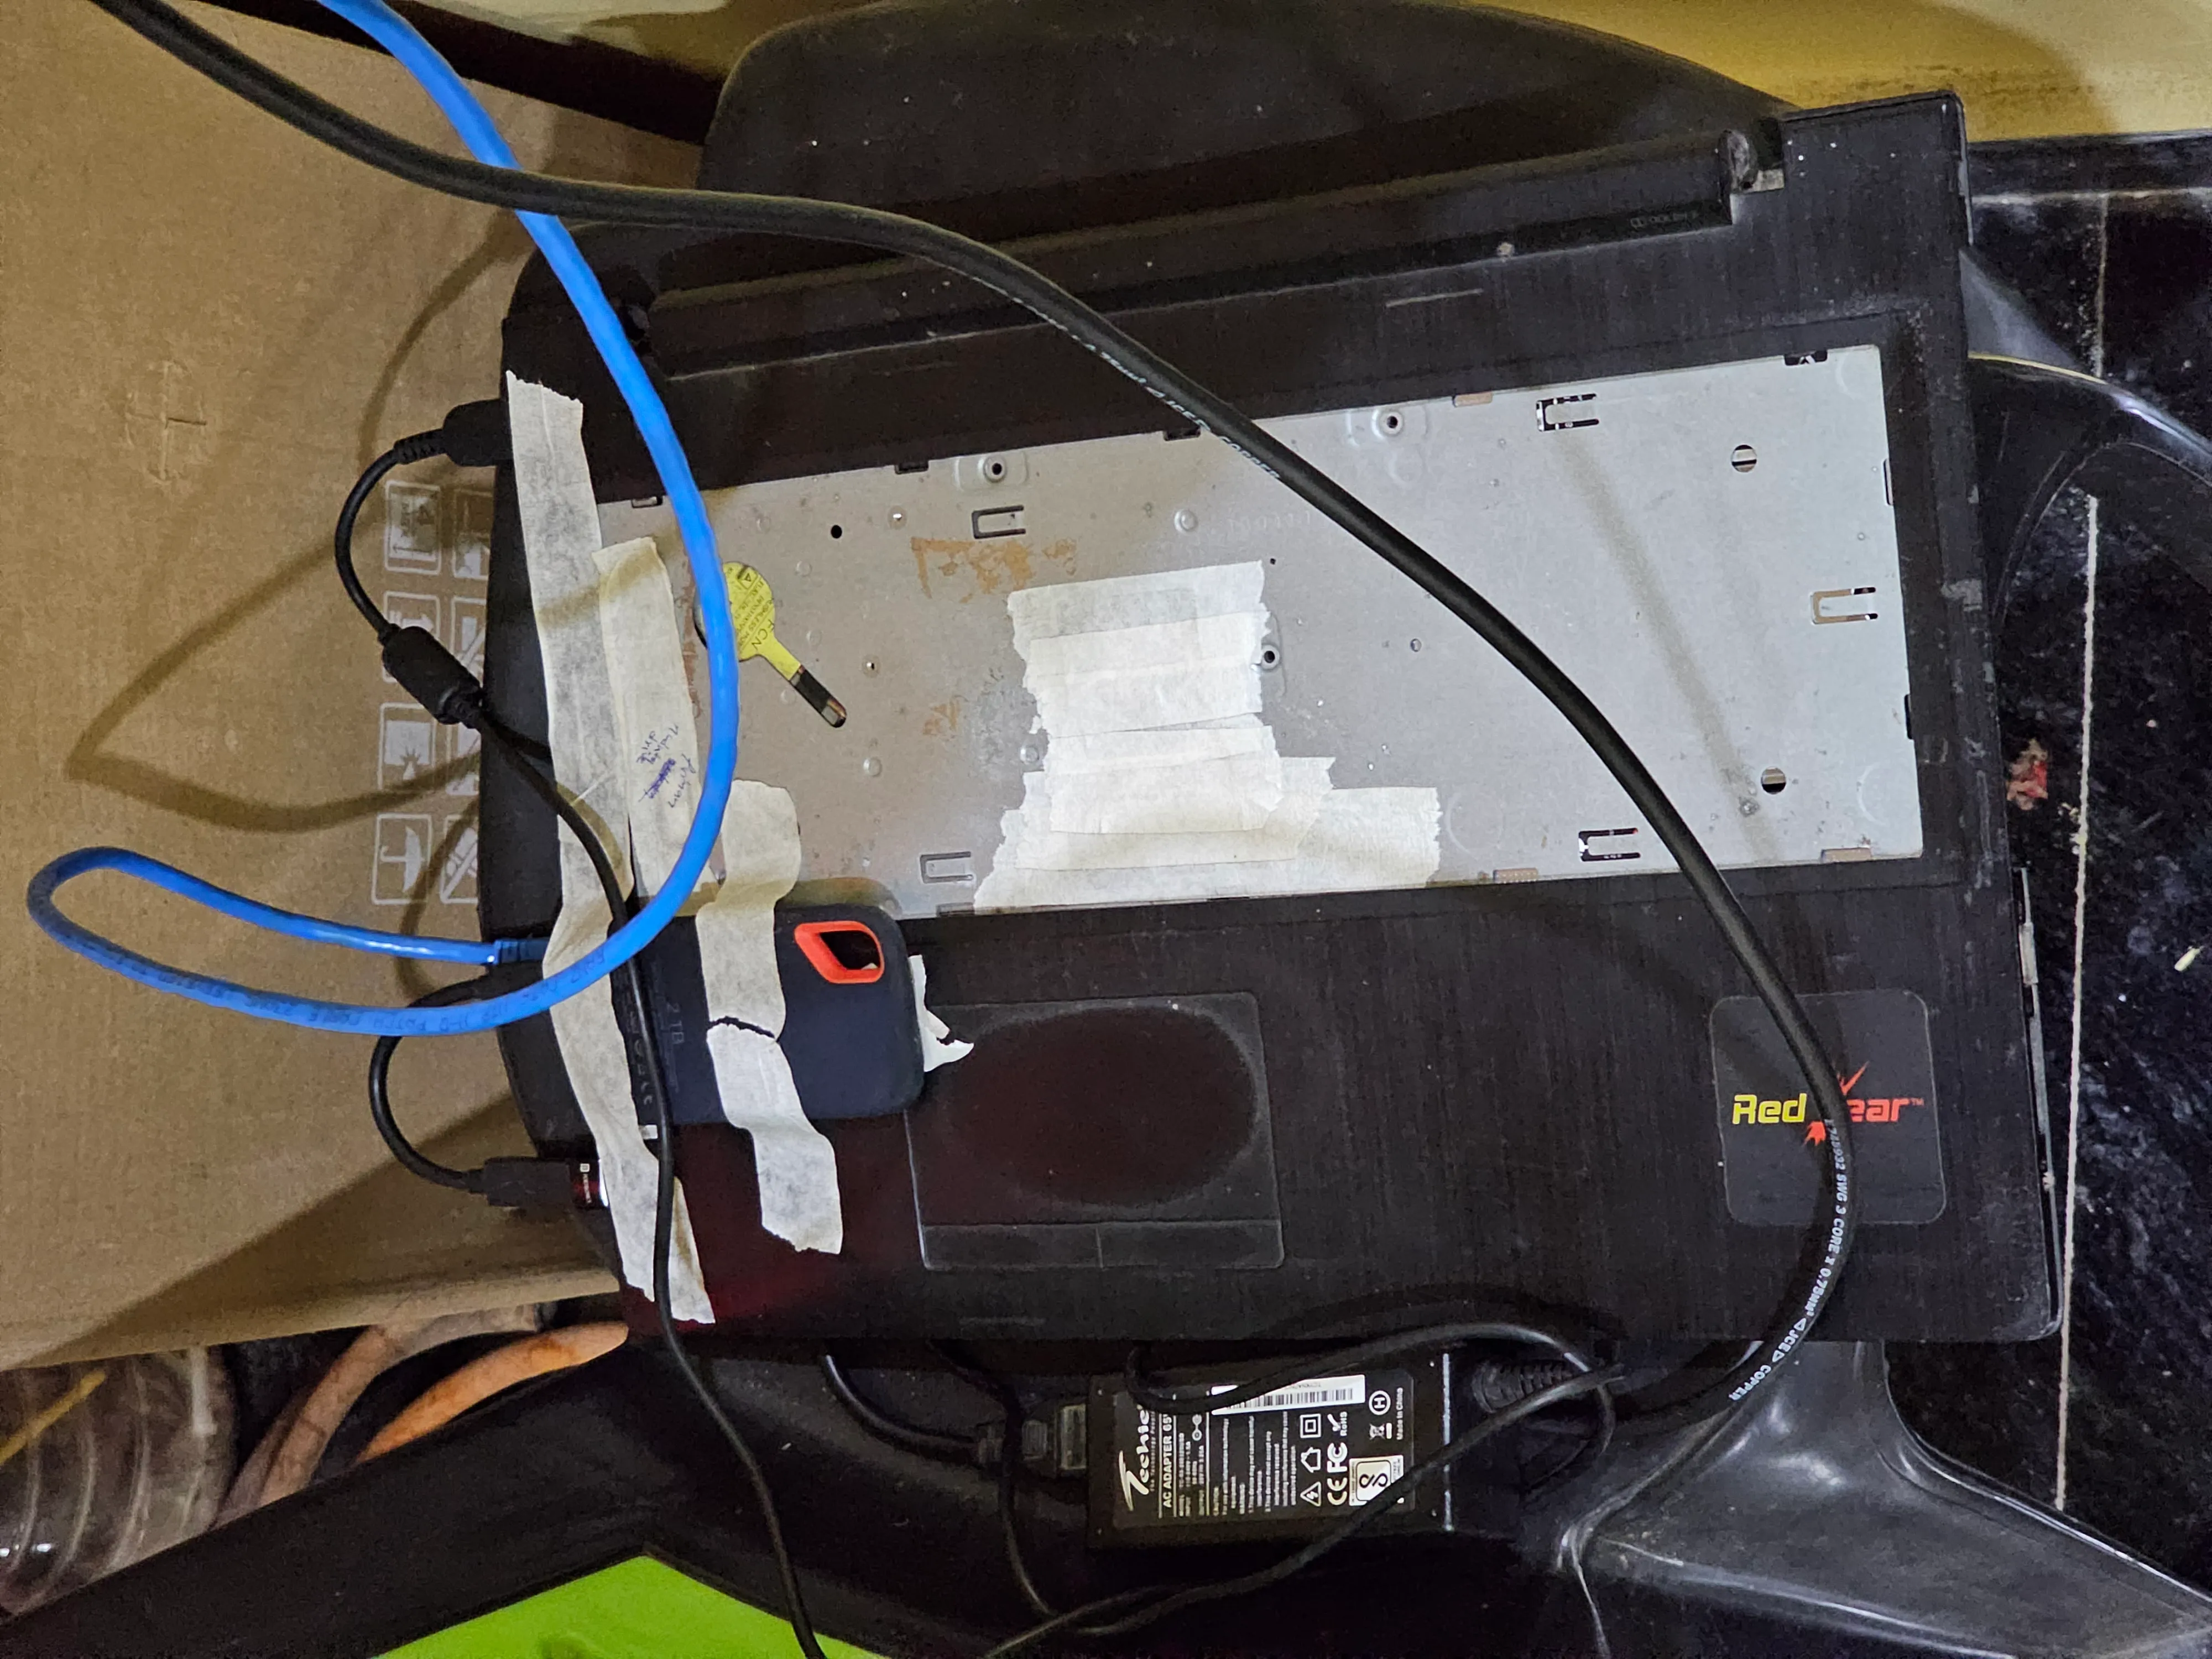
I decided to go with option 3, as I already have an old laptop with a broken screen. Except for that, my laptop’s specifications are pretty decent, with an Intel i3 5th-generation chip, 8 GB of RAM, and an internal SSD of 240GB.
For storage, I replaced the old DVD drive with an old 1TB hard disk with a caddy, and added my external 2TB portable SSD (which already contains old photos, movies, and other backups) via the USB port. The internal SSD will work as an OS drive and internal Docker volumes data. I plan to expand the storage with a reliable mirror backup solution in the future.
Getting the laptop ready
First, I removed the LCD screen from the laptop and made it headless. Here’s how it looks as of now
OS installation
For OS, I decided to go with Ubuntu Server 24.04.03 LTS. Created the bootable Ubuntu USB with Balena Etcher from my Mac. I won’t go into details about how to install Ubuntu Server; there are a lot of guides available on the internet. But here is the disk partition size I decided to go with.
/boot/efi   vfat    1G # boot loader location
/           ext4   25G # Root, where system data will be
SWAP        SWAP    8G # Same as RAM size
/mnt/data ext4 189G # Rest of the space for user dataDuring the installation process, it will require internet access. Either could be connected to WiFi or via LAN Ethernet. My laptop was not able to connect to WiFi; it could be a driver issue or a hardware issue, I don’t know, so I connected through Ethernet. It is also the best practice to keep the server connected via Ethernet instead of WiFi because of reliability.
Once the installation is done, create a non-root user
sudo adduser newusernameSet the password and, optionally, additional information. This user can also be added in the installation process. Let’s add the user to the sudoers group, so that the user can run sudo commands
sudo usermod -aG sudo newusernameOr, edit the sudoers file
# after the root user add the new user like this
root           ALL=(ALL:ALL) ALL
newusername ALL=(ALL:ALL) ALLThen we will log in through the new user account.
Docker
We will containerise all of the services with Docker. Let’s install Docker
sudo apt update
sudo apt upgrade
sudo apt install docker.io
sudo apt install docker-compose-v2Once Docker is installed, you need to add the current user to the docker group so that running Docker commands does not require adding sudo every time.
# create the docker group
sudo groupadd docker
# add the user to the docker group
sudo usermod -aG docker $USERAssign a fixed IP
Once the server is ready, you need to assign a fixed IP to the server, as the router assigns IP addresses dynamically to connected devices, and you do not want to have a dynamic IP address. So, we tell the router to allocate a fixed IP to the server by adding an Address Reservation entry in the router’s DHCP Server settings. This will map the MAC address of the server to a fixed IP. I have assigned 192.168.0.153.

Move Docker Volume
By default, Docker volumes’ data stays in the root directory. To accommodate the small size of the root and utilize the data partition, I moved my Docker volume to the data partition (/mnt/data) to accommodate the increasing size of the volumes.
-
Stop the Docker service
sudo systemctl stop docker -
Create/Edit the
/etc/docker/daemon.jsonconfiguration file with the location of the new data directory{ "data-root": "/mnt/data/docker" } -
[Optional] I also added this DNS entry to fix some issues with network unreachable errors for some containers while installing
"dns": ["192.168.0.1", "8.8.8.8", "8.8.4.4"]This entry can also be added individually to a particular container. Adding here makes the default for all containers.
-
Move the existing volumes’ data to the new folder
rsync -aP /var/lib/docker/ /mnt/data/docker/ -
To be safe, instead of deleting the old volume data, rename the directory as a backup
mv /var/lib/docker /var/lib/docker.bak -
Start Docker service
sudo systemctl start docker -
Once done, you can verify by checking other containers or running this hello world command
docker run --rm hello-world -
If no errors, the volume move is complete, and you can safely delete the old Docker directory
sudo rm -rf /var/lib/docker.bak
Automount drives
By default, external drives are not auto-mounted (at least in Ubuntu). You can run mount to manually mount a disk. To automate the mounting every time the system reboots, you need to add entries to the /etc/fstab file.
-
Get the UUID
lsblk -fThis will show all drives, including the unmounted ones.
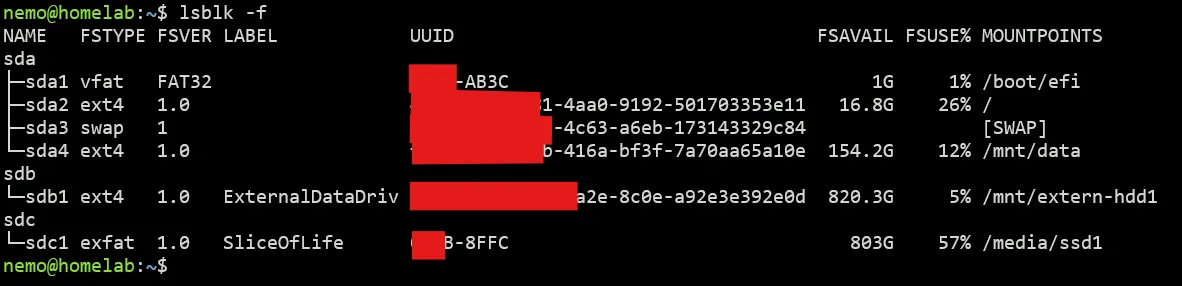
-
Grab the UUID of the drive (A12B-8FFC) and make an entry to fstab. Open the fstab file
sudo vim /etc/fstab -
Create the mount directory where the drive will be mounted
mkdir /mnt/extern-hdd1 -
Add this line at the end of the file
UUID=A12B-8FFC /mnt/extern-hdd1 ext4 defaults,nofail,x-systemd.device-timeout=10s,x-systemd.automount 0 2See fstab documentation for fstab options. The option
x-systemd.automountis used to mount the drive on boot. -
Repeat this process for other external drives.
-
Mount all drives in fstab
sudo mount -a
This setup should be sufficient for now to have the server up and running.